The Client Maintenance app allows you to add or update client information. In LegalOffice, a client consists of one or more Identities. An Identity can represent an individual, company, trust, or partnership.
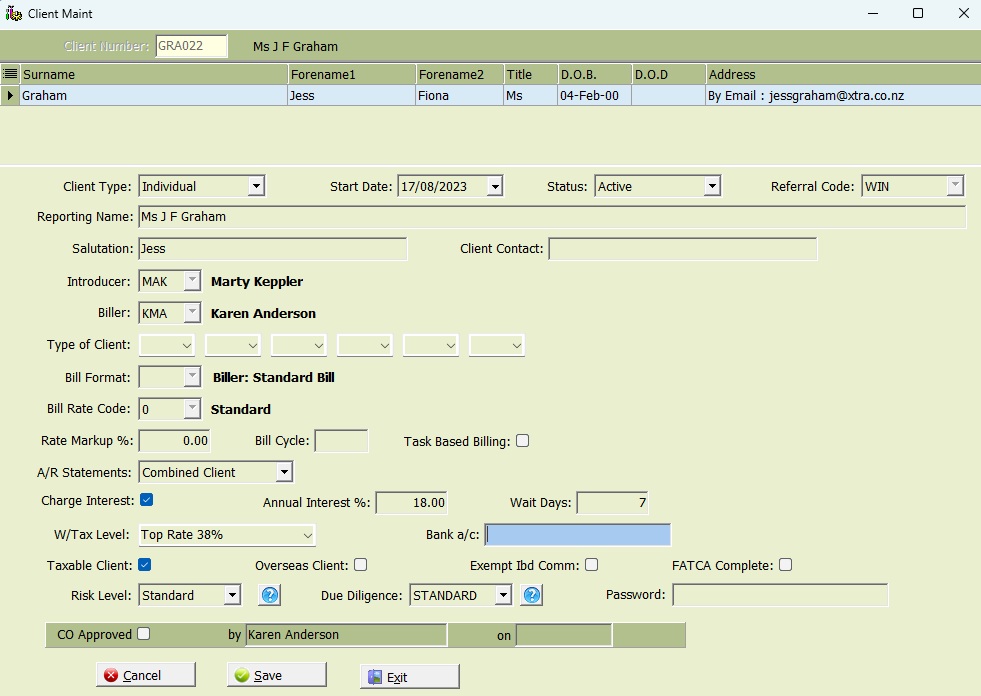
The second step is to configure information and system settings for the client entity. These settings enable personalised services, such as how to address the client in communications, deliver debtor statements, apply debtor interest, format bills, set client-specific charge rates, and more.
Before you create a new client and identity, you should check they do not already exist in your system.
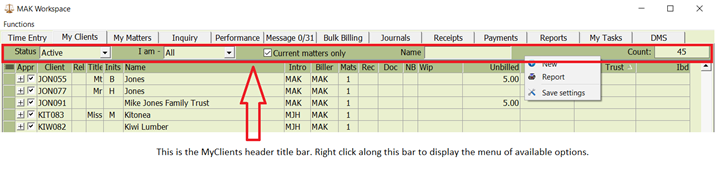
Open the Workspace MyClients tab.
Right click on the filter title bar and select New.
The Identity selection screen will now display. For individuals, enter the surname name of the Identity in the surname field. For non-person Identities, enter the full entity name in the surname field e.g. Spark NZ Limited.
Press the Tab key to display a list of similar identities already in the database. If the Identity is an individual, you can refine your search by entering their first name in the Forename field.
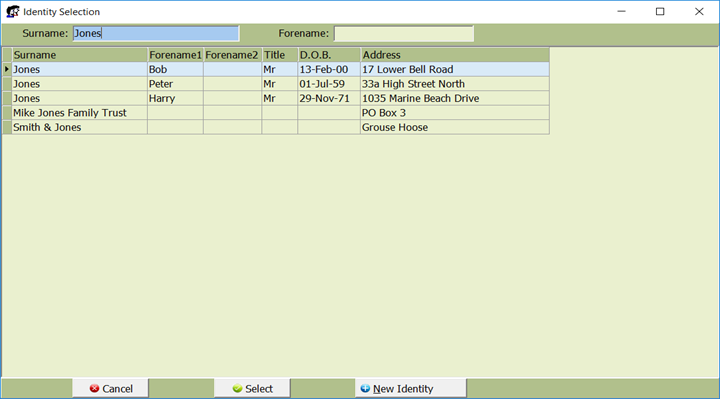
If the Identity already exists, you can cancel this process and instead search for and use the existing client record if applicable.
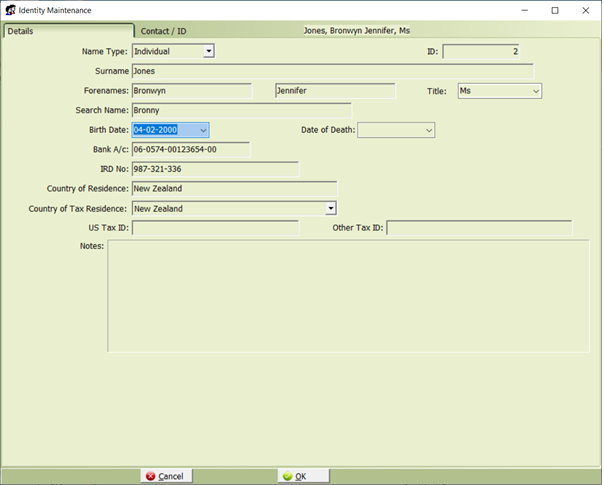
On the Details tab, use the dropdown list to select the appropriate Name Type for the Identity. Then, tab through the fields and complete the form with the required information.
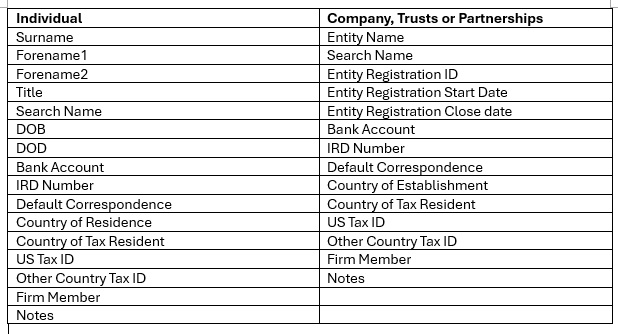
The following fields are available on this screen, depending on the selected Name Type (types of Identities):
Once you have completed the Details tab, click on the Contact/ID tab to enter address, telephone, email, and identification information.
You can add an unlimited number of Contact/ID records. To add a record, right-click in the relevant grid area (e.g., Address, Phone, etc.) and select New from the options menu.
You can share an address, phone, or email record between Identities. To share a record, first add a new record type (e.g., Work Phone). Then, right-click and select Share. A lookup screen will appear, allowing you to search for and select the record using the Identity name.
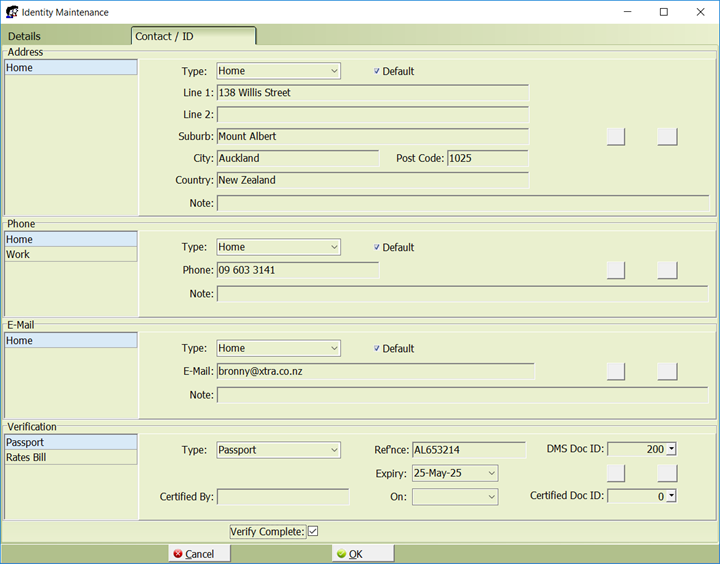
When you have finished adding verification information for the identity, tick the Verify Complete box to indicate all required verification information has been loaded.
Click the OK button the save your changes and open the client maintenance app.
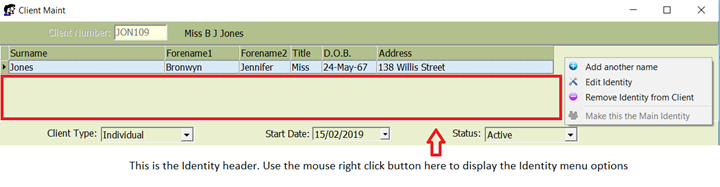
To add additional named Identities (e.g., for a joint client), right-click on the Identity header bar and select Add Another Name.
To modify an existing named Identity, right-click on the Identity and select Edit Identity.
To delete a named Identity, right-click on the Identity and select Remove Identity from Client. If the Identity has no other relationships in LegalOffice, you will be prompted to confirm whether you wish to remove the Identity record completely.
For clients with multiple named Identities (e.g., for a joint client), one must be designated as the Main Identity. The system automatically sets the first Identity added as the Main Identity. Information from the Main Identity will be used as the default for client details such as address, phone, email, and bank account information.
To change which Identity is set as being the Main Identity, right click on the Identity and select Make this the Main Identity.
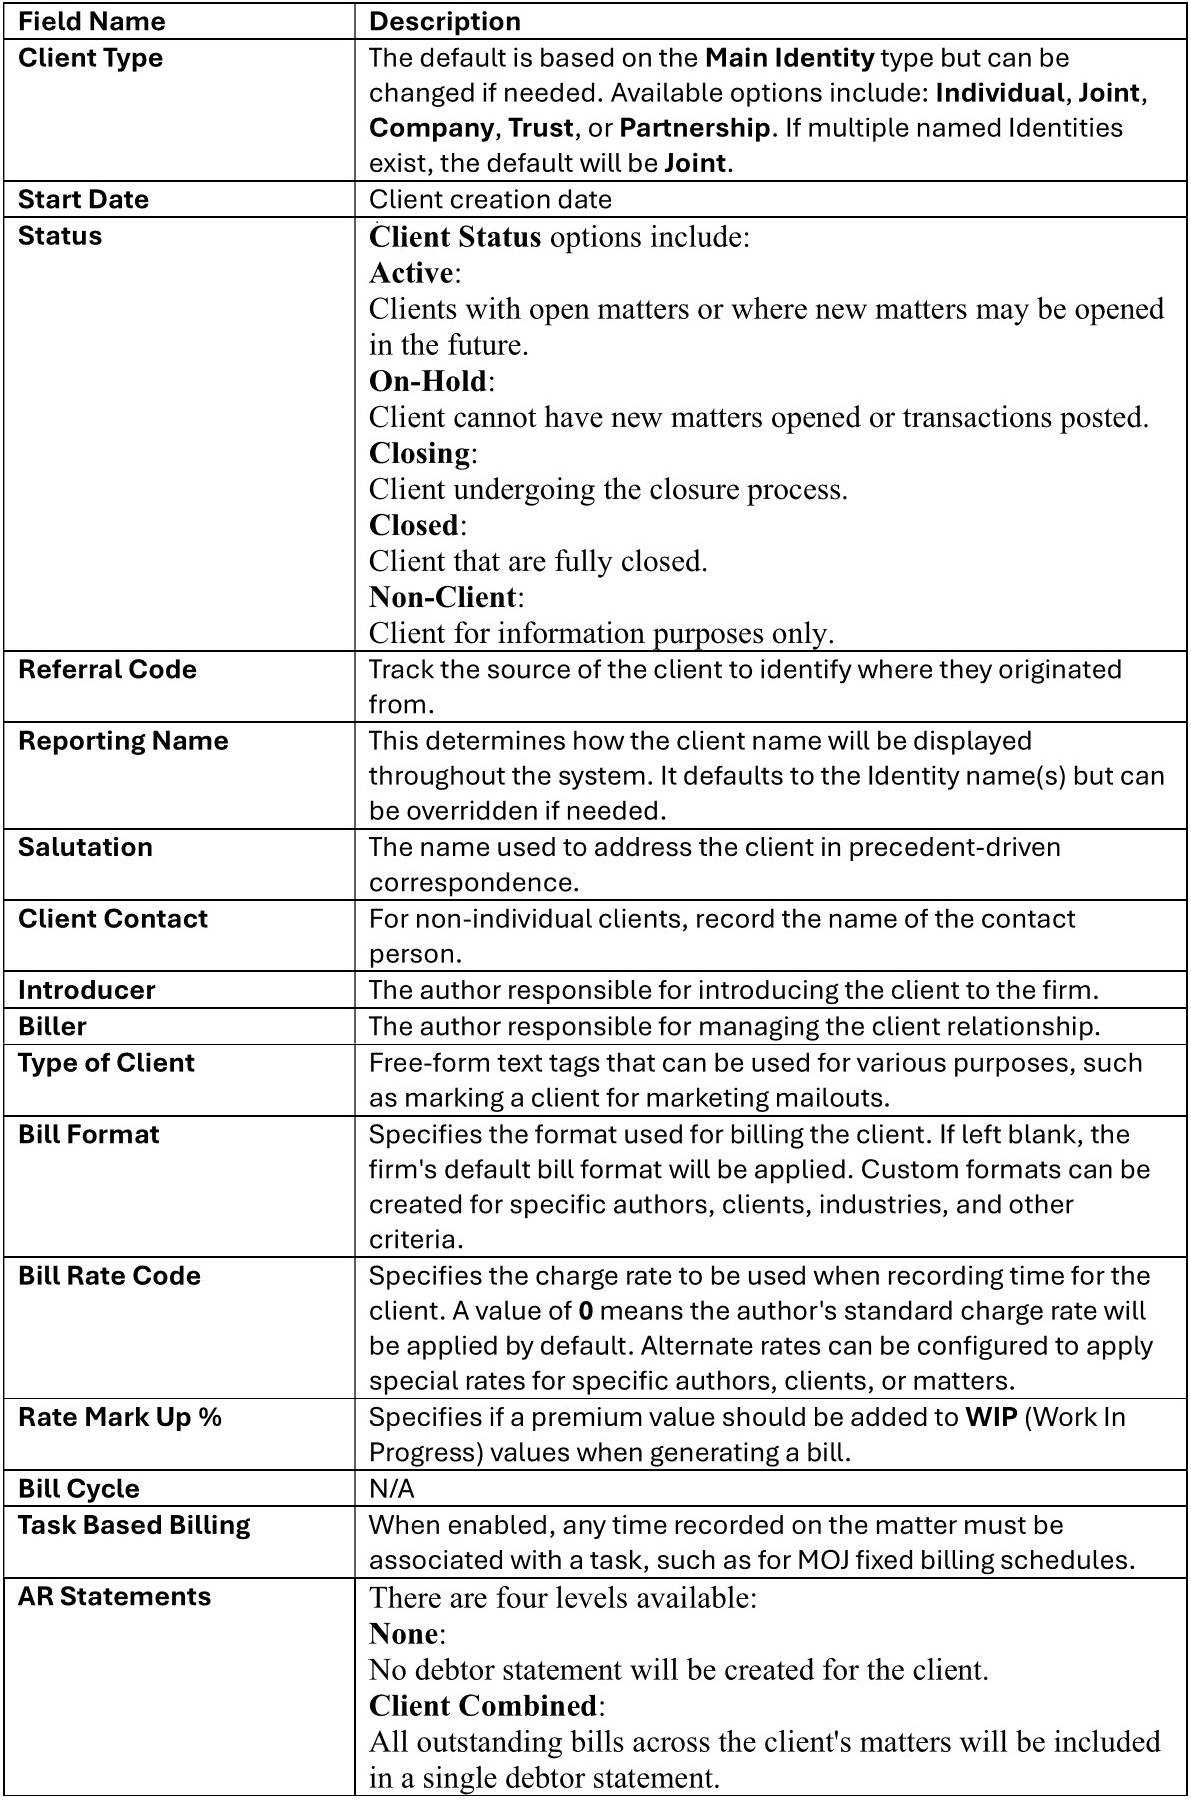
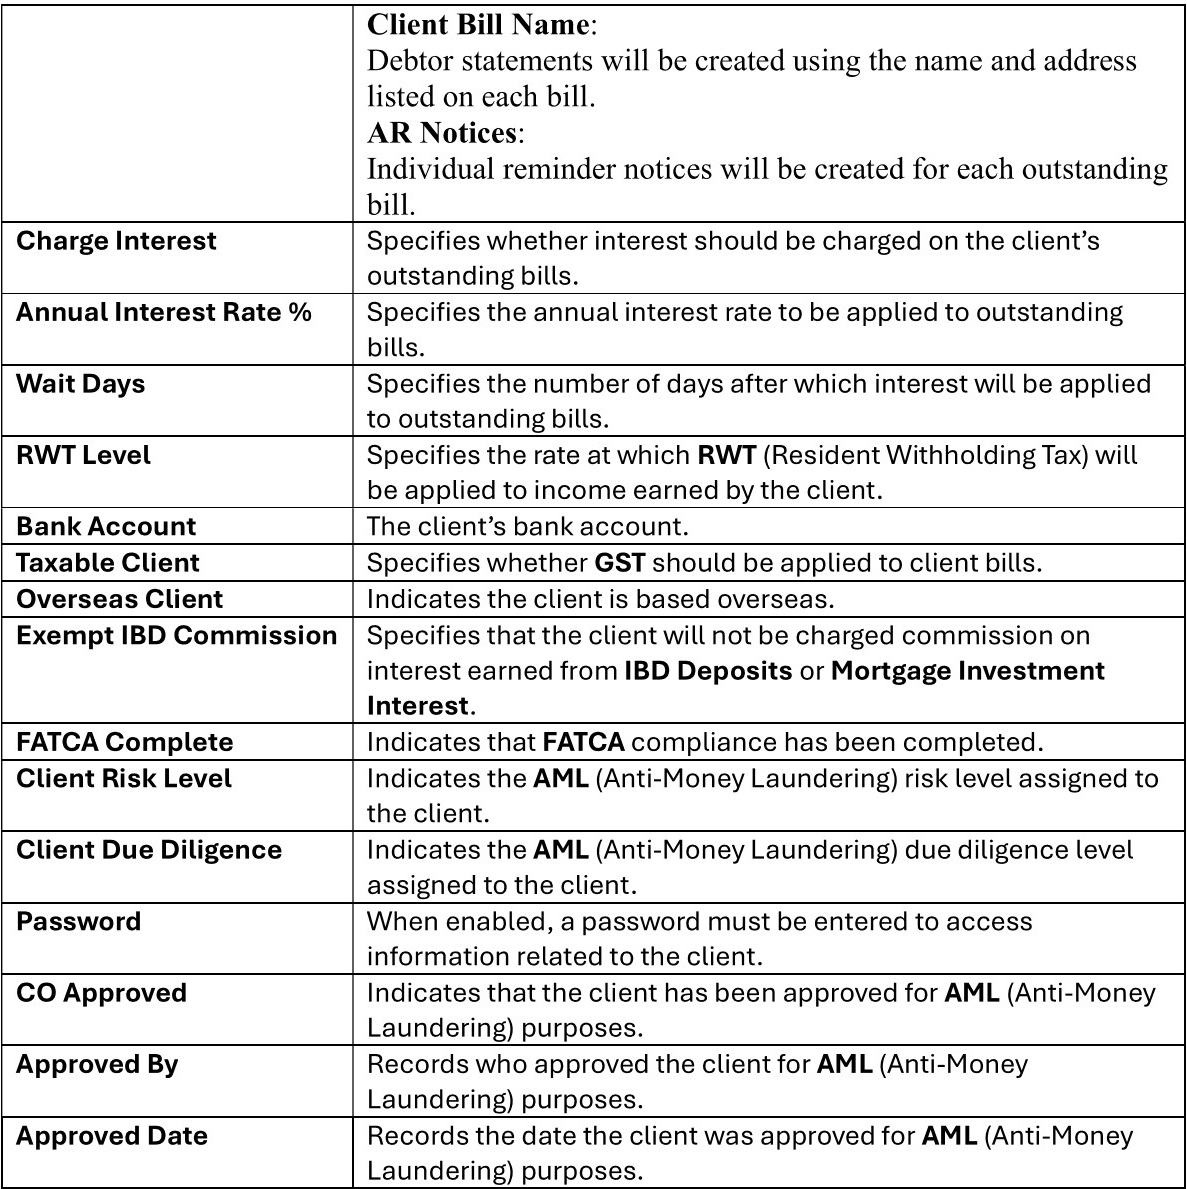
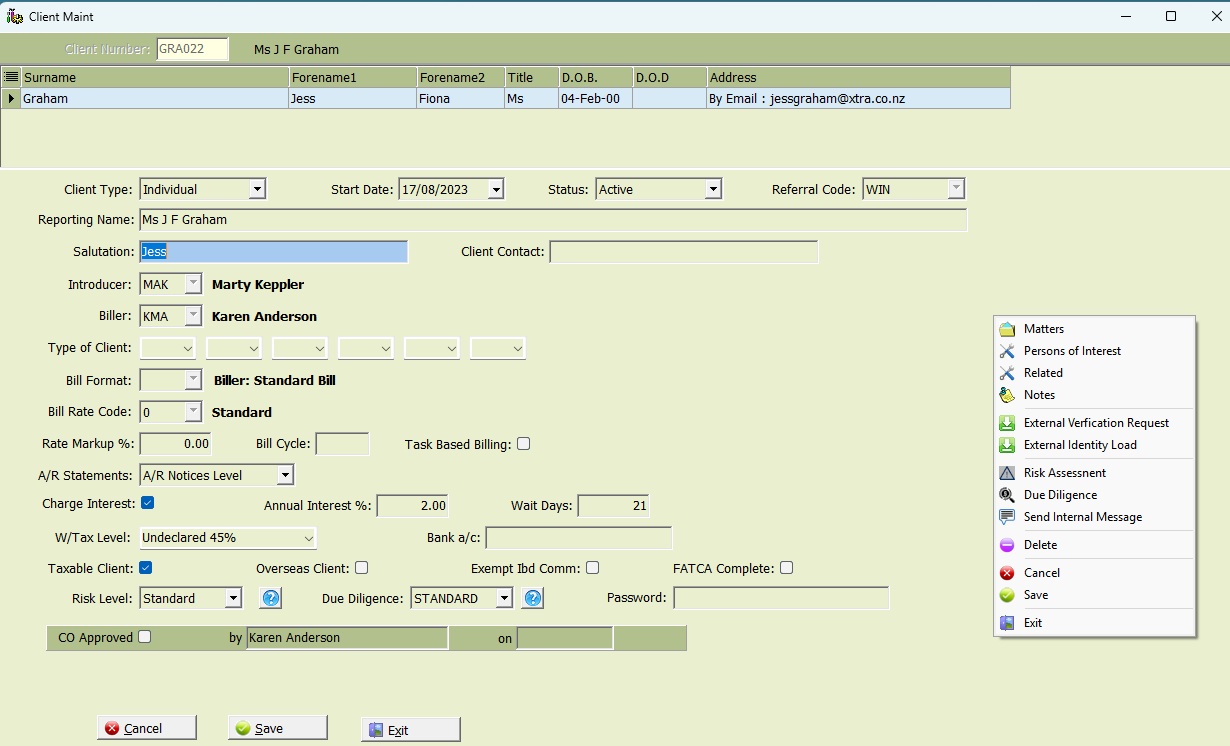
The following fields are available on the client maintenance screen;
Once you have finished entering any additional client information, click the Save button to save your work.
Additional functions are available within Client Maintenance. To access these, right-click anywhere on the coloured area of the Client Maintenance screen to display the menu options.
Matters
Select this option to open the Matter Maintenance app to add or edit matters for the client record.
Persons of Interest
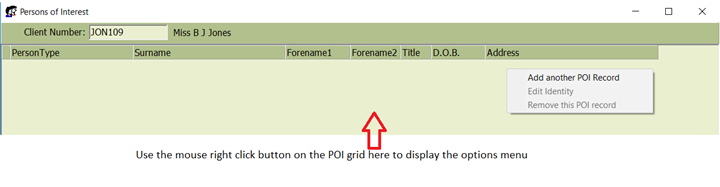
Right-click to display the program menu and select Add Another POI Record.
Enter a label describing the relationship type. You can either choose from the dropdown list of predefined types or manually enter a custom relationship type.

The Identity Maintenance screen will now appear. Use this app to enter the details of the Person of Interest.
Related
Use this function to associate clients, allowing you to view any relationships between them. You can create an unlimited number of relationships between clients.
Select the Related option to open the Related Clients Maintenance app.
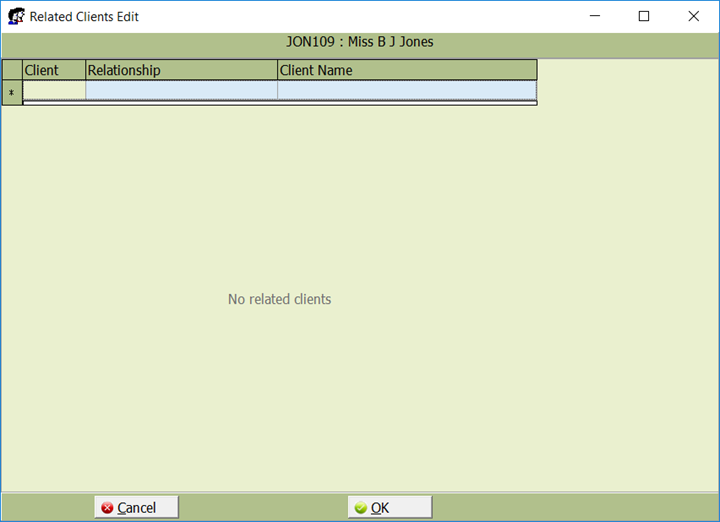
Enter the client number directly into the Client Field or double-click on the Client Field to search for the client.
Use the dropdown menu to select or add a description of the relationship.
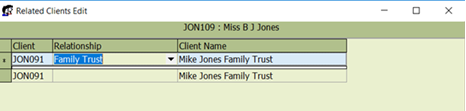
Tab to load the record and then click the Ok button the save and close the program.
Notes
Select Notes to add a client note. This is a free-text field with no length limit. You can also tick the Important box to mark the client as having important notes that need attention.
Click OK to save and close the program.
External Verification Request
Read more here about creating clients with data from a 3rd party provider Add a Client using information received from a third party – LegalOffice User Guides
External Identity Load
Read more here about creating clients with data from a 3rd party provider Add a Client using information received from a third party – LegalOffice User Guides
Risk Assessment
Select this option to view or edit the Client Risk Assessment form. For more details, refer to the Client AML Guide.
Client Due Diligence
Select this option to view or edit the Client Due Diligence app. For more details, refer to the Client AML Guide.
Send an Internal Message
Select this option to send a message to another LegalOffice user. For more details, refer to the Messenger Guide.
Once you have finished entering the additional client information, click the Save button to save your changes.
Delete
Delete the client record from LegalOffice.
Cancel
Cancel all changes made and revert the client to its original state.