Customers of AML providers, such as APLYID and FirstAML, can seamlessly import client and due diligence information collected by their provider.
This eliminates the need for staff to manually enter client details. Information captured and submitted by third parties can be directly imported into a client identity record. This may include contact details (e.g., addresses, email addresses, and phone numbers), identity verification documents (e.g., passports and proof of address), and more.
The feature supports various client types, including individuals, joint clients, companies, trusts, and estates. Due diligence identity information associated with clients, such as company directors or trust trustees, can also be imported as CDD identities.
Additionally, this functionality allows for the updating of existing client and identity records.
This guide explains how to use the LegalOffice interface. For details about the operation of your AML provider’s app, please consult your provider directly.
Set Your Preferred AML Provider in LegalOffice
In your LegalOffice preferences, use the dropdown menu to select your AML provider and input the URL for directing new client requests.

Using Variables as Required
<FirmID>: Directs your provider’s API to interact directly with your LegalOffice database.
<Client>: Ensures your provider includes the relevant reference in the returned information, enabling an immediate match with the shell client.
<Requester>: Refers to the staff member who initiated the AML request. If included in the submitted information, LegalOffice will notify the requester when the information is available for import.
Set Up – Users
You can control which users have access to this function through the User Maintenance app:
- On the Details tab, select the Workspace Client Import checkbox.
- Open the relevant user record.
- On the Functions tab, select the External Identity Import checkbox.
Where Can I View This Information?
Submitted client identity information is displayed on the Workspace Imports tab. Once imported and linked to client identity records, these entries are automatically removed.
The tab includes a counter that auto-refreshes, enabling you to see when new records become available.
The Import Process
Create a Shell Client in LegalOffice
Start by creating a shell client. This is a placeholder client record with just enough information to recognize and match submitted records. At a minimum, you need:
For individuals: the surname and forename.
For companies, trusts, or other entities: the full entity name.
Initiate External Verification
Once the shell client is added, right-click on the client record and select External Verification Request from the menu.
This action opens your provider’s web portal, where you can proceed with contacting your client. Follow the steps outlined by your AML provider to complete the process.
Once your client has fulfilled and submitted the AML request, the data will be returned and displayed in the Workspace Imports tab.

Select the client you want to import, then click the Import Selected button.
The Client Import Preview app will appear, showing:
- Top Grid: Details of the submitted client information.
- Bottom Grid: Any potential matches or conflicts found in your LegalOffice system.
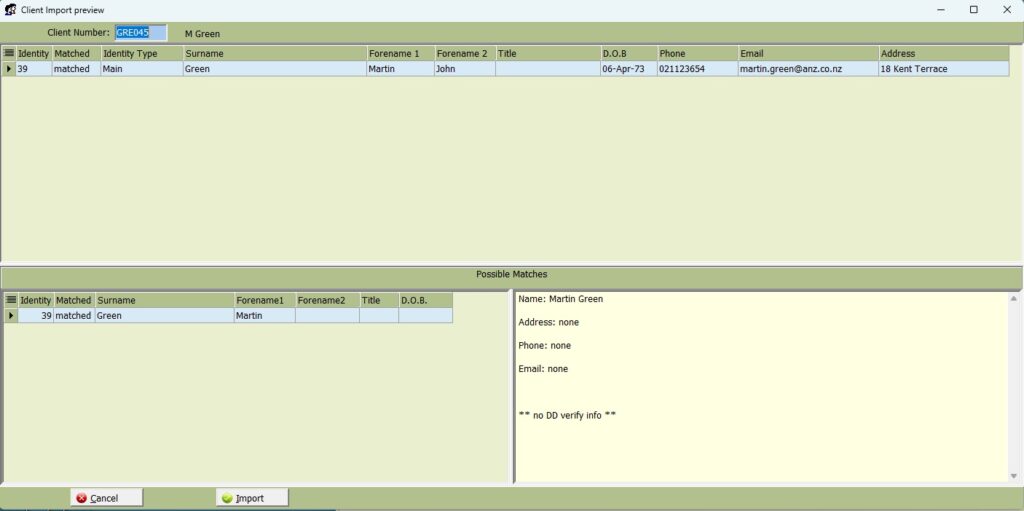
In the above example, the imported information has been successfully matched to the shell client, and the status is displayed as Matched.
Click Import to update LegalOffice with the imported client information.
If multiple LegalOffice client records have similar names, select the correct client from the list to ensure the data is imported to the appropriate record.