Learn about the different ways you can save emails into the Document Management system.
This page focuses on Microsoft Outlook users. If you use a different email client please refer to https://docs.legaloffice.co.nz/docs/user-guide/document-management/saving-any-document-to-the-dms/
Outlook users can use our Office add-in or our Drag & Drop functionality, both of which help speed up the saving of emails. For example, when completing a metadata form the Outlook add-in will autofill the client matter reference last used with the email address.
Attachments included in an email are automatically saved within the email itself and you can also elect to save the attachments as separate files in the DMS.
Saving received emails using the Add-in
To save an individual email;
- Press the F12 key after opening the email or, after having selected the email from a list in an outlook folder, and the DMS Metadata pop up will display.
- Click on the Outlook ribbon bar entry for the DMS Add-in, after opening the email, or after having selected the email from a list in an outlook folder and the DMS Metadata pop up will display.
To save multiple emails;
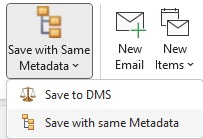
- Click on the ribbon bar Add-in icon and select ‘Save with same Metadata’. Once you have selected the emails you wish to save, press F12 or click the Add-in Icon. The Metadata pop up will display once, enter the correct details and press save. All of the selected emails will save to the client matter.
Saving received emails using Drag & Drop
Drag & Drop saving will save the email against the selected client matter and use your system default values for variable metadata fields like the Store, File Type, security level etc.
Attachments included in the email are automatically saved within the email itself, Drag & Drop saving will also use your system default values on whether to save attachments as separate files not not.
You can save any received email by dragging the email (a single email or a multiple selection of emails) directly from your Outlook inbox and dropping this onto a client record displayed in MyClients, a matter record displayed in MyMatters, a client record open in Inquiry or, a matter record open in Inquiry.
When saving to MyClients or MyMatters, Drag & Drop the file anywhere along the client matter record line.
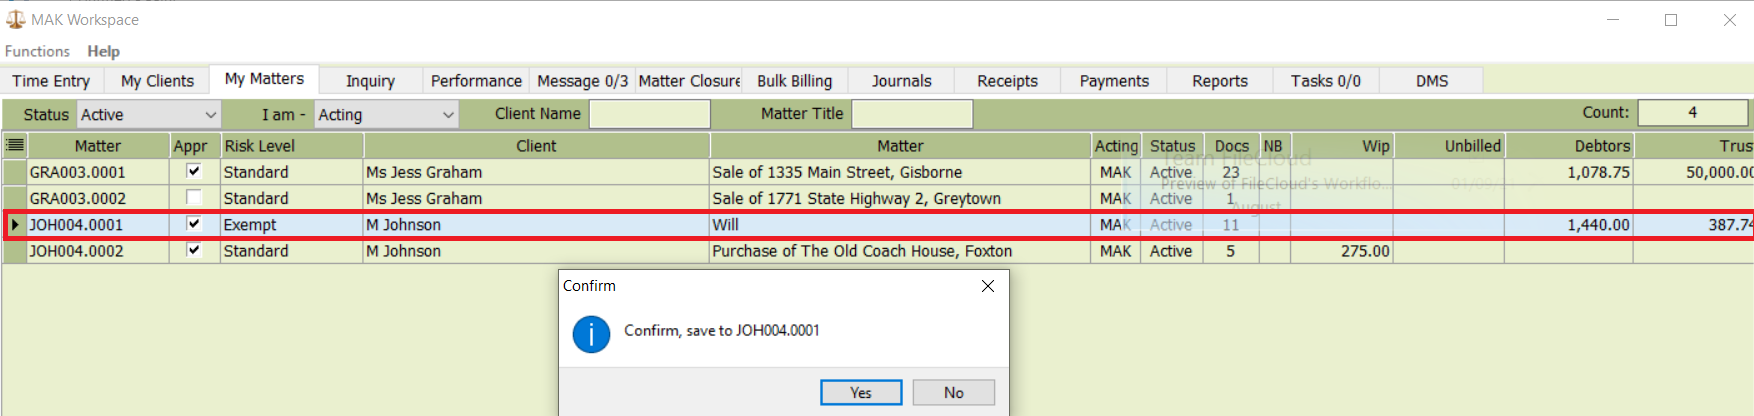
When you drop your email, the client matter record will highlight indicating it has been selected and a confirmation message will display.
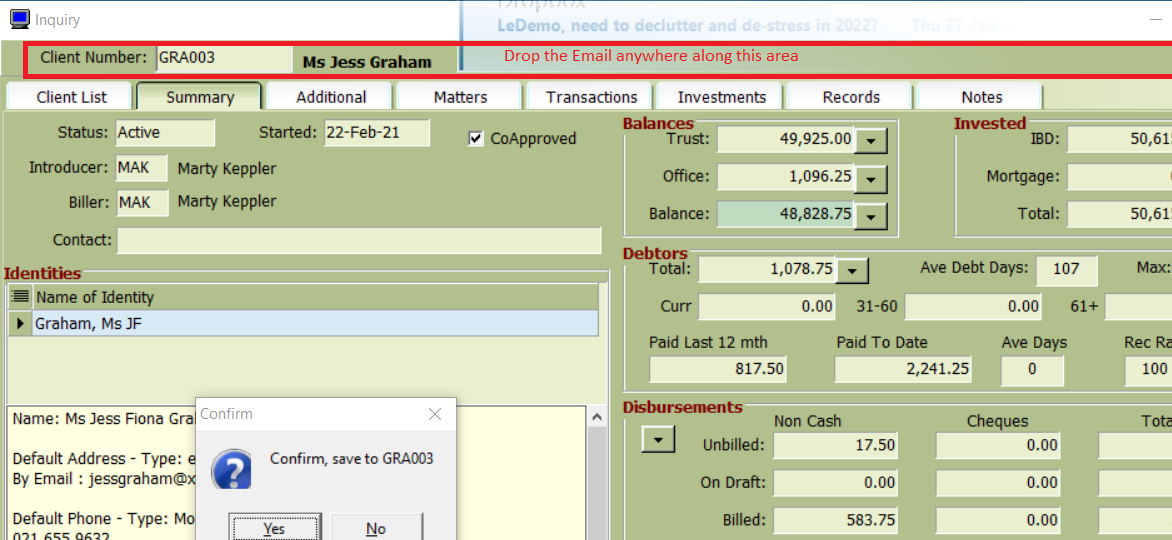
When saving to Client Inquiry, drag and drop the file anywhere along the line where the client reference and name are displayed and a confirmation message will display.
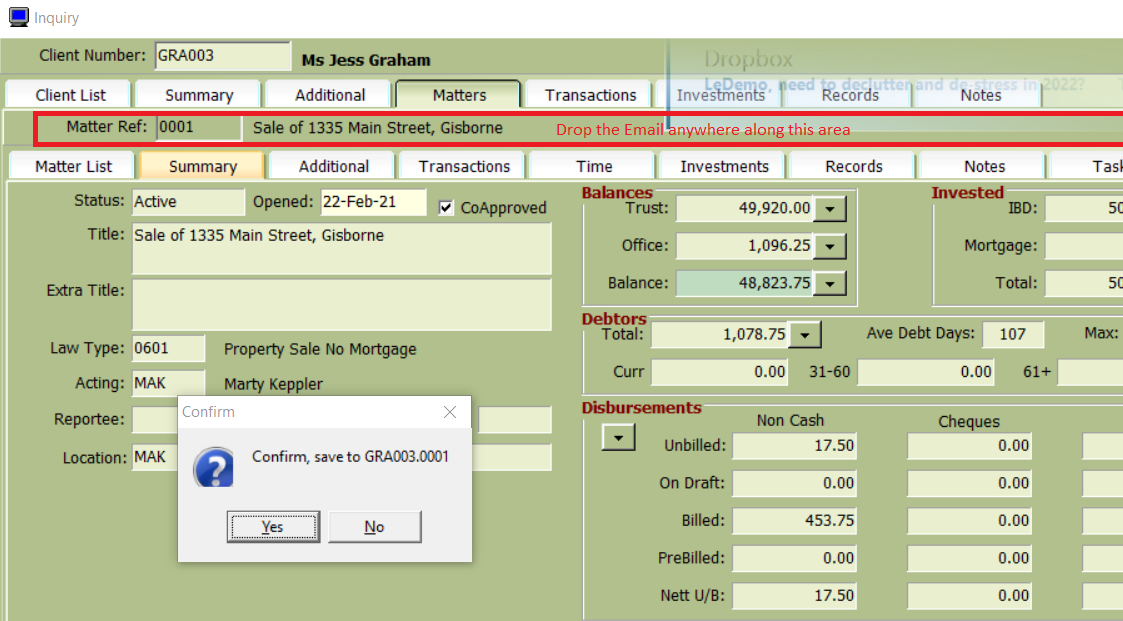
When saving to Matter Inquiry, drag and drop the file anywhere along the line where the matter reference and title are displayed and a confirmation message will display.
Please note the Drop and Drag feature is not yet supported with Office 64bit apps.
Saving sent emails using the Add-in
When you create a new email or reply to a received email, notice the DMS icon located on the message ribbon bar. Make sure the ‘Save to DMS’ and ‘with metadata’ options are selected.
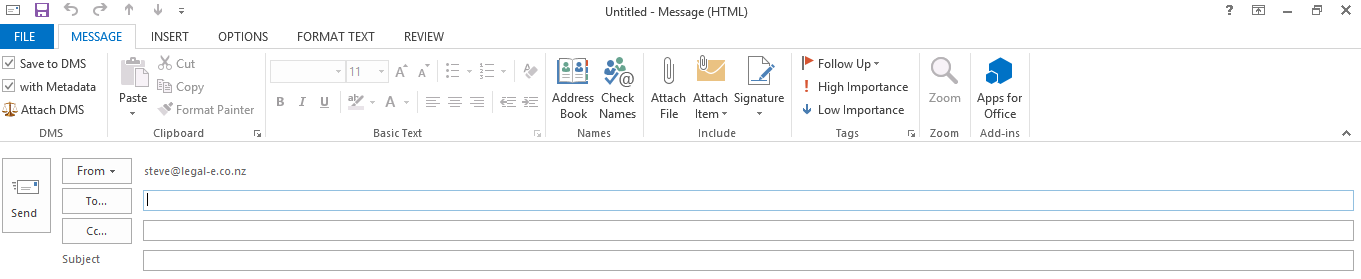
You can also attach files held in the DMS to the email using the ‘Attach from DMS’ icon.
Emails will be added to the DMS automatically after the email has been sent. This allows the sent time and date confirmation to be captured in the DMS.
The DMS metadata screen will display once the email has been sent. If you have saved an earlier email with this address, the metadata screen will pre prompt with that client and /or matter information.
Saving sent emails using Drag & Drop
While drop and drag isn’t really applicable to saving sent emails, as these are saved automatically when the email is sent, you can use the same process to save emails from your Sent items folder.
Document Metadata
Metadata is important.
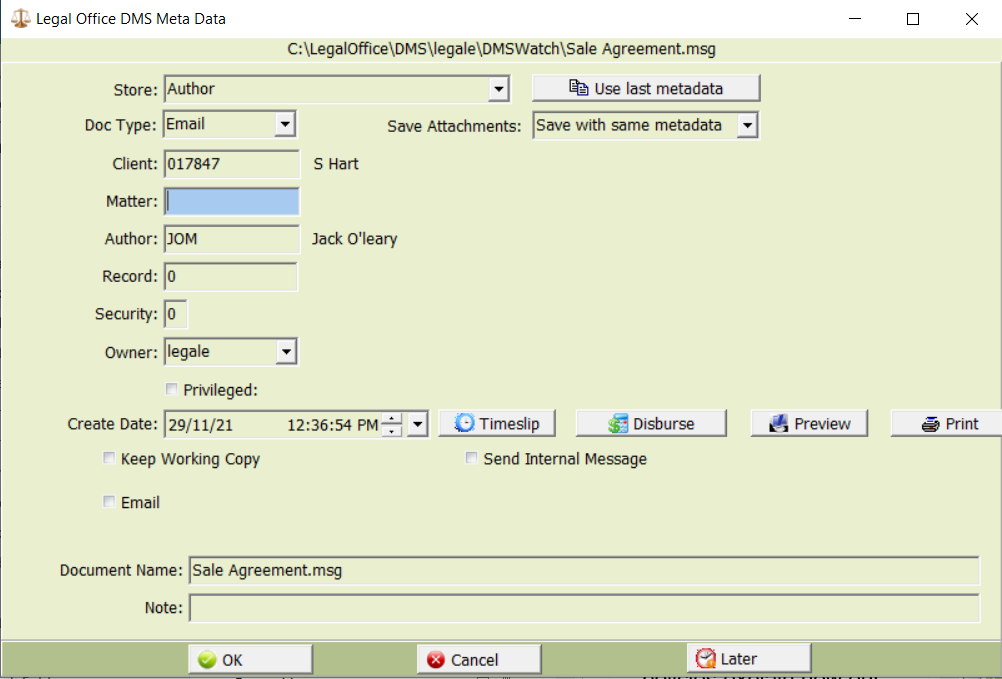
Metadata is information about the document e.g. the client or matter file reference, and this is used to help you locate the document later. The function to display all documents for a client will not work fully if you have saved client documents with incorrect or insufficient metadata.
All client documents should, at a minimum, be saved with the client number entered in metadata. Adding the matter reference, where appropriate, will enhance location and retrieval functions.
Non client documents should be filed under the author/owner responsible or in specific Stores e.g. HR, Management
Other metadata fields available and that should be considered are:
Store
A store is like a folder and is a way to group documents together. The default store for client documents is ‘Client’ but you can use whatever store you decide to be meaningful or appropriate.
DocType
Document type is a label indicating what the document is e.g. Statement.
Save Attachments
The Save attachment option displays when the email you are saving contains an attachment. The options are;
- Save as a separate file in the DMS with the same metadata as the email containing the attachment
- Save as a separate file in the DMS with different metadata to the email containing the attachment
- Don’t Save as a separate file in the DMS but save the attachment embedded in the email.
Author
This is the author who is ultimately responsible for this document.
Record
This field is used to link a scanned image e.g. a signed Will, with a client record held in a deeds packet.
Security
Documents can have security levels set to restrict user access. It is unusual to add security to client documents, more generally this is used for the firm’s business documents.
Owner
This is the document creator.
Privileged
A flag to indicate a document is privileged and should not be included in discovery.
Document Name
The document name.
Note
A note about the document. Can be used to explain the document in summary form to assist file perusal.